The DNS Manager page in your Account Portal is a tool that visualizes all your domain's DNS records and allows for additions or modifications to your current list of DNS records. The majority of users will never need to edit or even view the DNS records. Use the tool only if you need to create new custom DNS records or redirect existing DNS records to third-party destinations.
If your domain name points to our nameservers (sns1.gate.com and sns2.gate.com), then you can use the DNS Manager tool. If not, contact your nameserver provider for assistance with any DNS records changes.
This article assumes that you are already familiar with how to log in to the Account Portal. If you do not know how to log in or have forgotten your password, please refer to this article first.
The article contains the following sections:
- Adding new DNS records
- Editing existing DNS records
I. Adding new DNS records
1. Log in to your Account Portal Area at: https://secure.gate.com/.
2. Click on Domains and then on DNS Management from the left sidebar.

The DNS Manager page will show the DNS zones of your active domain names.

Note: If you have added DNS zones for domain names that you have registered through a third party Registrar, they will be listed under the Other section.
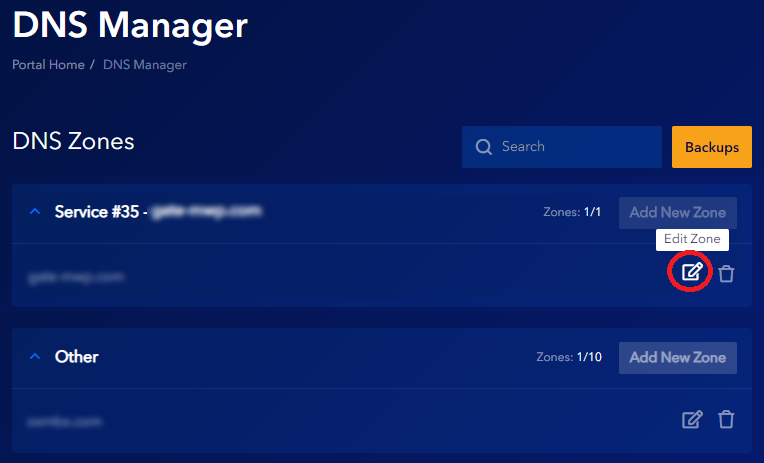
3. Find your domain name in the list shown and on the Edit Zone button to view your DNS zone.
6. Click on the Add Record button.
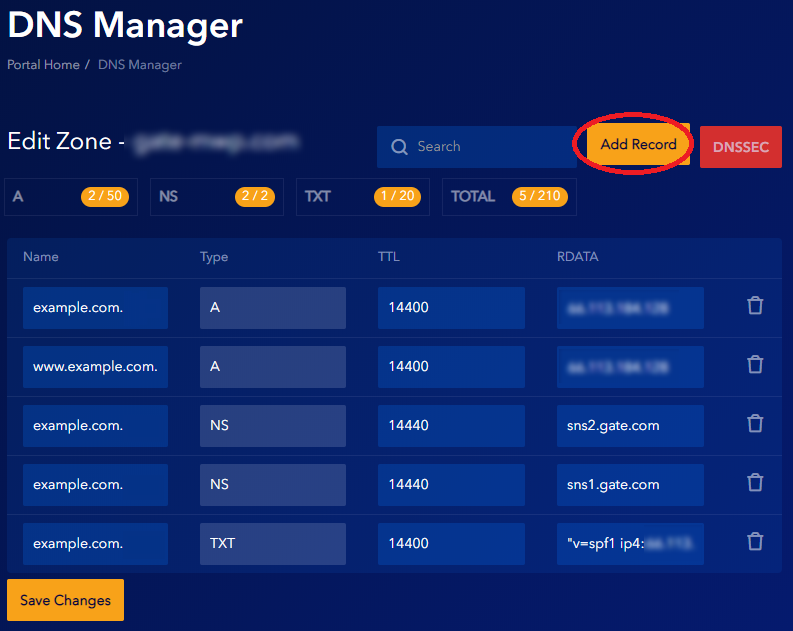
7. An Add New Record pop-up window will appear.
From the drop-down menu, select the type of record you would like to add. Fill in the requested information. This will change depending upon the type of record added.
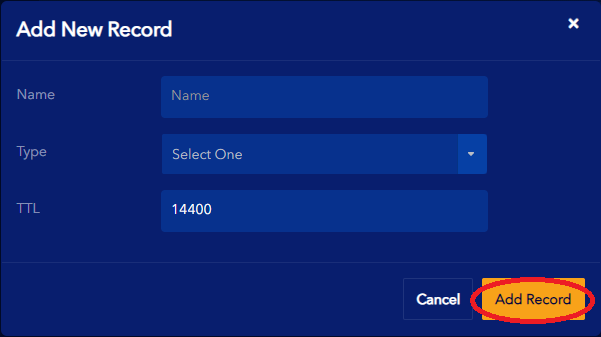
8. Click on the Add Record button when you are ready to add the new record to your DNS zone.
A green notification message will appear to confirm that a new record has been successfully added to the zone.

IV. Editing existing DNS records
Keep in mind that there is a propagation time when DNS changes are made. Typically, the propagation time takes a few minutes for DNS changes to update across the Internet's DNS system, however it can occasionally take longer (4-6 hours) for a change to take effect.
1. Follow the instructions in Section I. Adding new DNS records of this article to access the DNS Manager tool.
2. Click on the Edit Zone button right next to your domain name to view your DNS zone. You will be given options to add, update, or remove records.
3. On the Edit Zone page, you can choose to change the name of either the Name (Source) or the RDATA (Destination) of an existing record.
Hint: Before you update an existing DNS record, it is recommended to lower its Time To Live (TTL) value to 300 seconds (5 minutes). This way the DNS propagation time should be shorter.
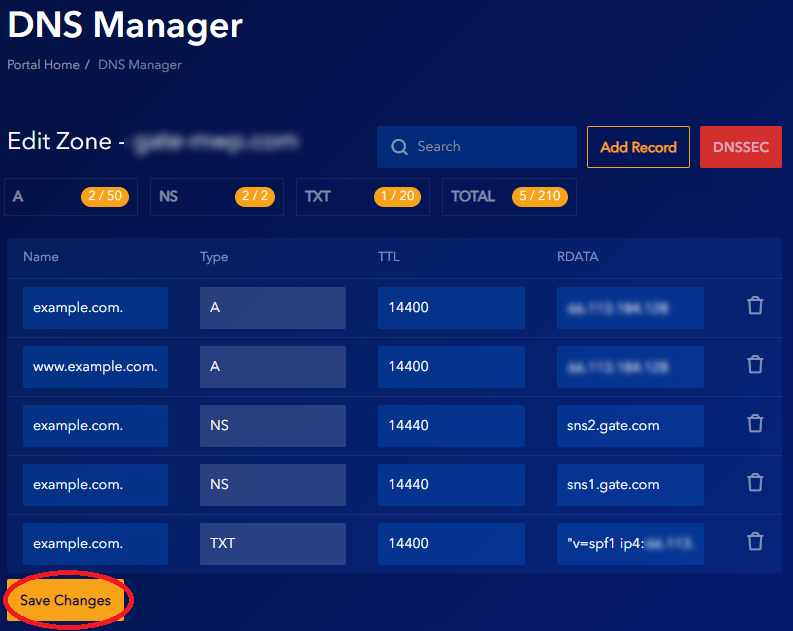
When you are ready with the changes, click on the Save Changes button.
A green notification message will appear to confirm that the changes have been saved successfully.

4. If you need to delete a DNS record, click on the Remove Record button right next it.

Important Note: Modifying your DNS information can result in website and/or e-mail failure. Be sure you need to make these changes prior to modifying any information. Please do NOT delete pre-existing records unless you are certain of its consequences.
If you have any further questions that were not answered in this article, please contact us.
