There are many reasons why you might want to have a staging site. A staging site is typically used for development work, new feature implementation and testing, without running the risk of breaking your live website or impacting the experience of your visitors.
With your WordPress toolkit, you can quickly create an exact clone of your live website and use it as a staging one. Here’s how it’s done:
- Log in to your Gate.com Server Manager. For instructions, visit the related article here.
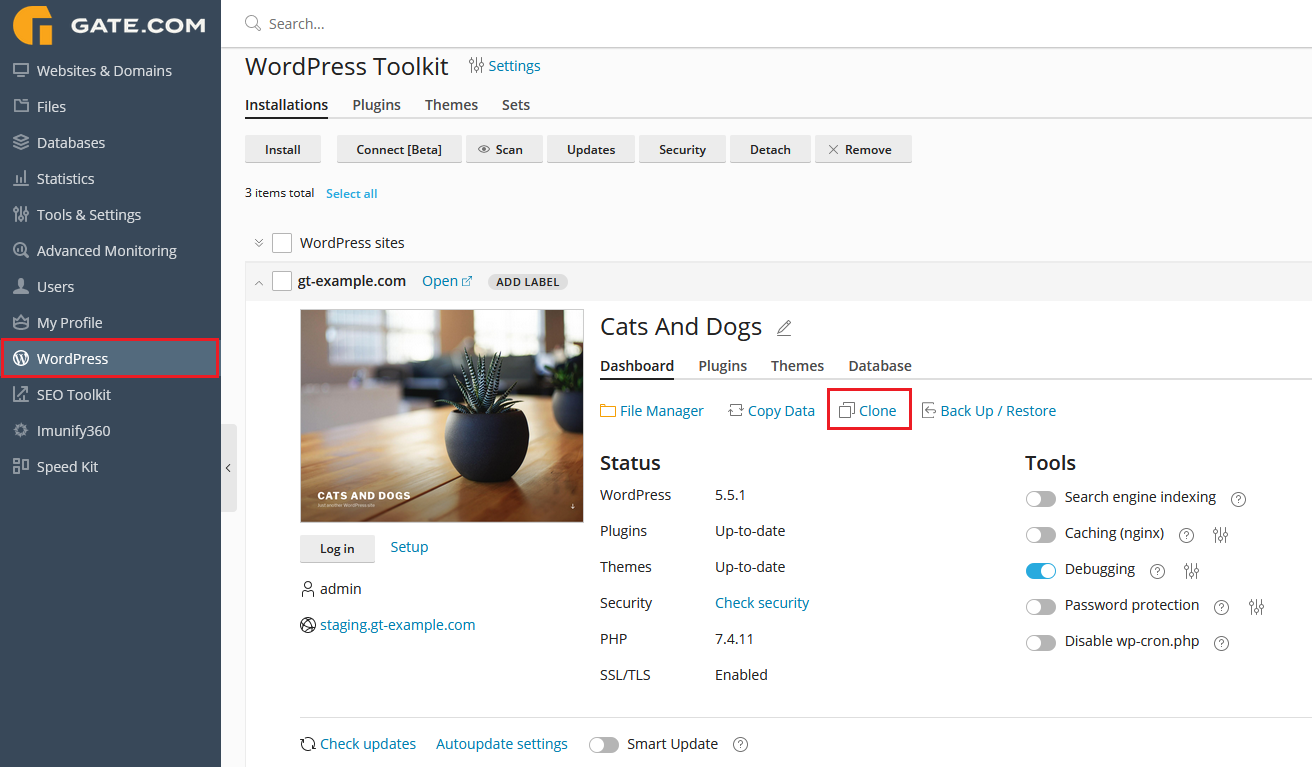
- Navigate to your WordPress section and select the ‘Clone” option.
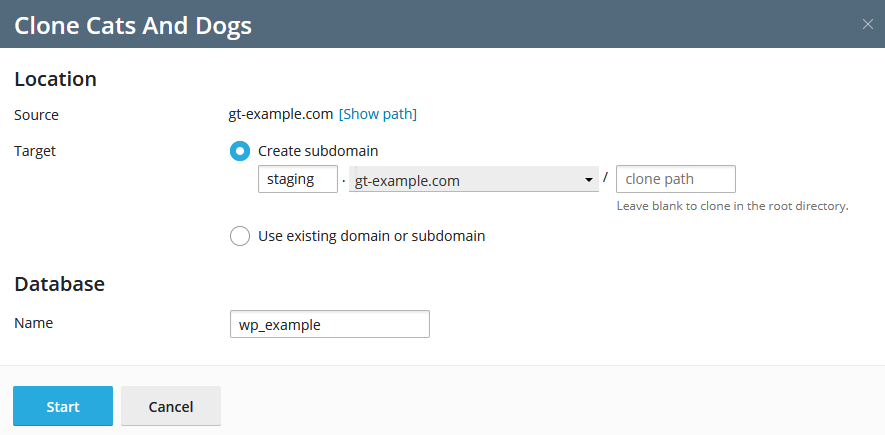
3. Select the subdomain option and choose your desired 3rd level domain (typically, that would be the default value i.e. staging.example.com) and wait for the cloning process to finish.
4. Next you need to create the necessary DNS record for your new 3rd level domain.
- If you are using Gate.com’s nameservers for your domain, you can add the necessary record from your Client Portal. For instructions on how to manage/add DNS records through your Client Portal, please visit the related article here.
- If you are using a 3rd party dns provider, you will have to add the record from their control panel. Here’s the record value:
Type: A
Source: staging.example.com (if different, replace “staging” with the name you selected and replace “example.com” with your own domain)
Destination: Your Managed WordPress server IP (you can view your server IP from your “Services” section in your Client Portal. It should look similar to this: 66.113.188.145
5. Test your new environment and if you encounter any issues, contact our support to configure your staging site manually.
