To import a WordPress website from another host, first log in to your Gate.com Server Manager Portal. For instructions on accessing it, please refer to the How Do I Access my Gate.com Server Manager article
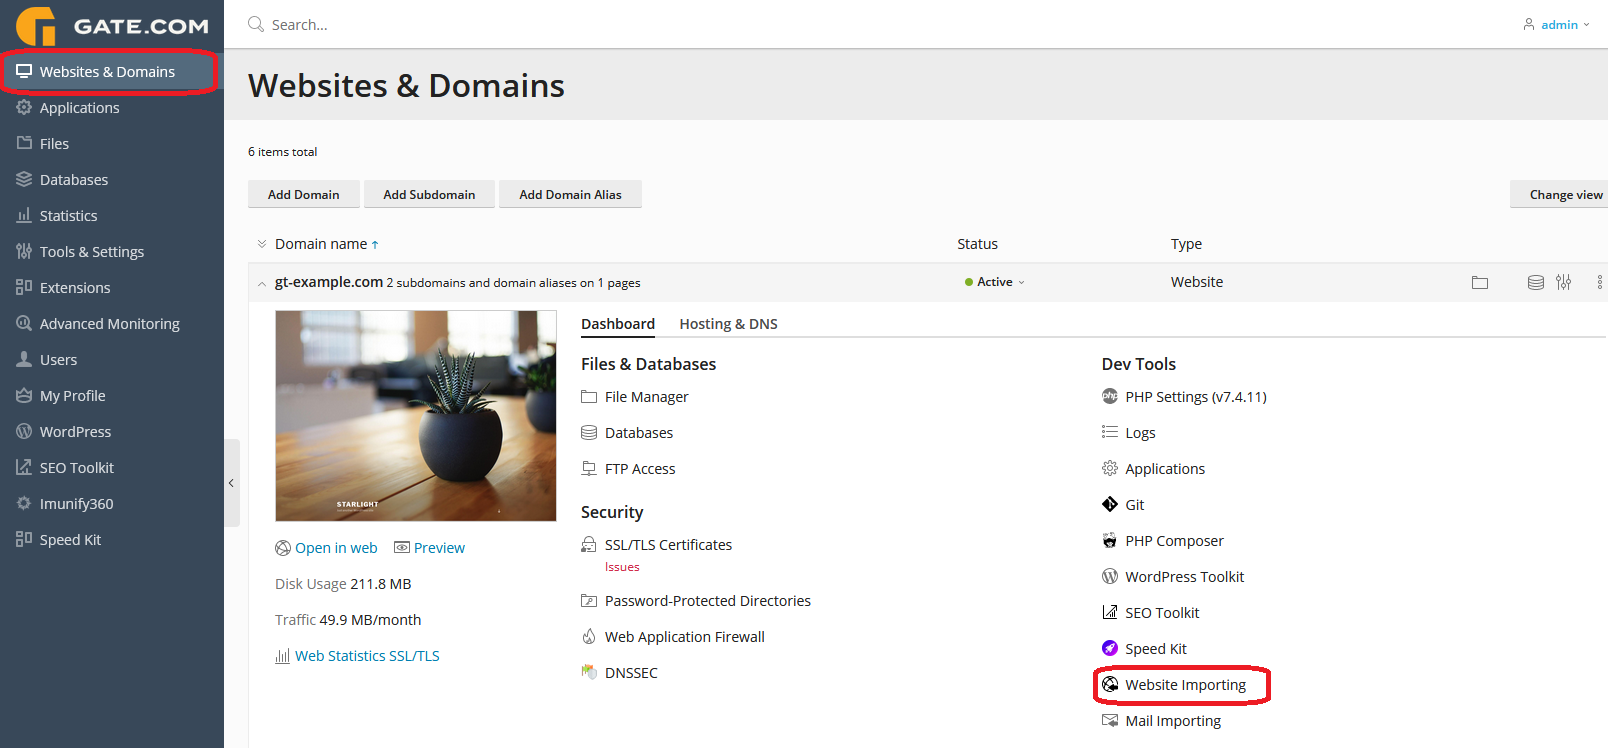
Navigate to the "Websites & Domains" section and select "Website importing" for the desired domain web space. If you don't know how to add a new domain to your server, please refer to the How Do I Add a Domain to my Subscription? article.
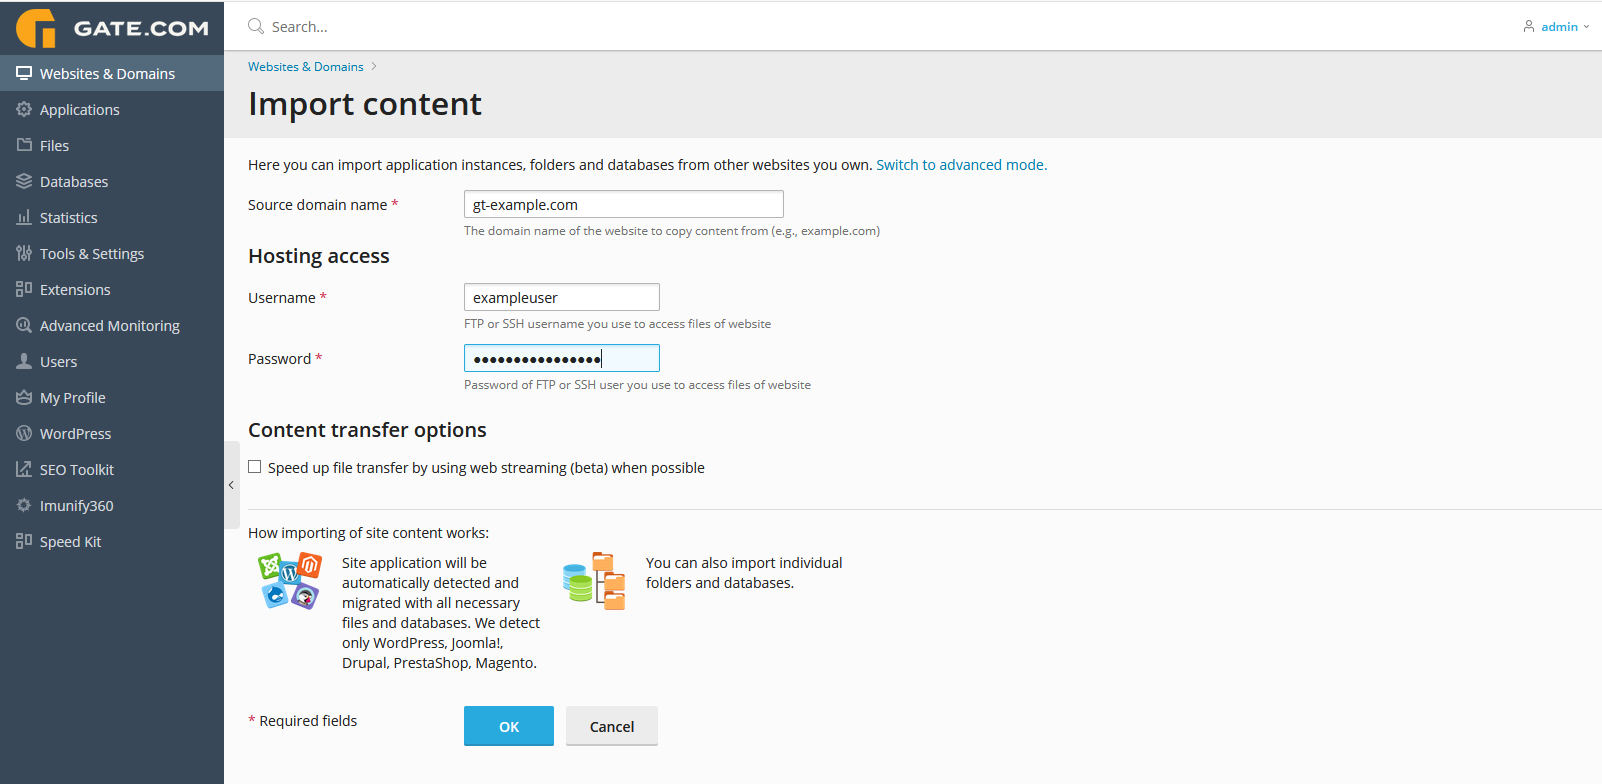
By default, website import is performed in simple mode. In simple mode, you only need to specify the source website’s domain name and the username and password of the FTP or SSH user that has access to the source website’s files.
If the connection is not successful, make sure that the following requirements are met and try again:
- The source website’s domain name resolves to the correct IP address from the target server.
- The FTP or SSH username and password are correct. The FTP or SSH user has access to all files and directories of the source website.
- You can connect to the source server via FTP from the target server.
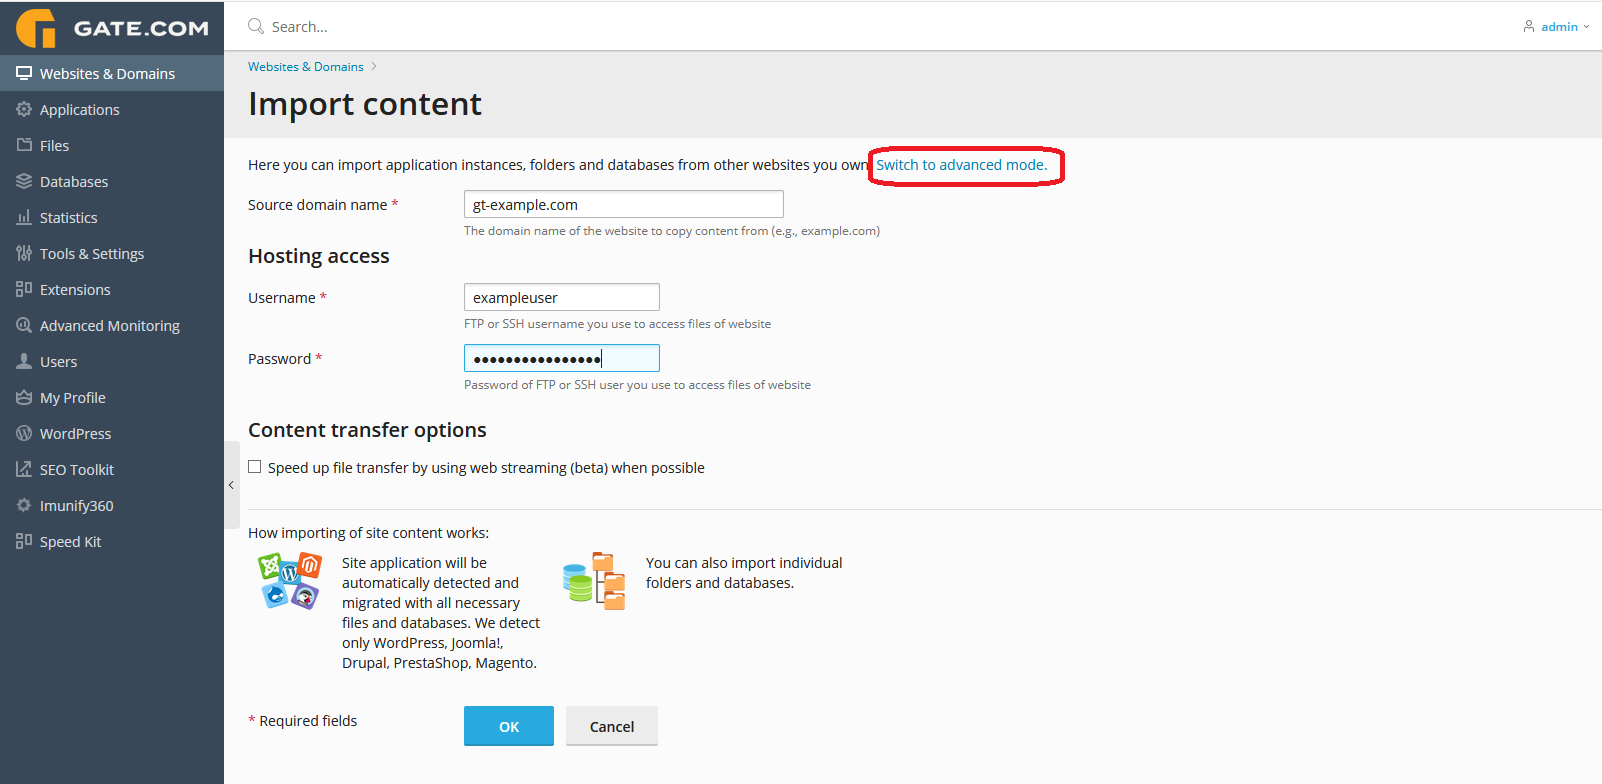
If the connection is successful but scanning for content fails, you can try importing in advanced mode. In advanced mode you can explicitly choose the connection type, specify the document root, choose the protocol for data transfer, and more.
- Click “Switch to advanced mode”.
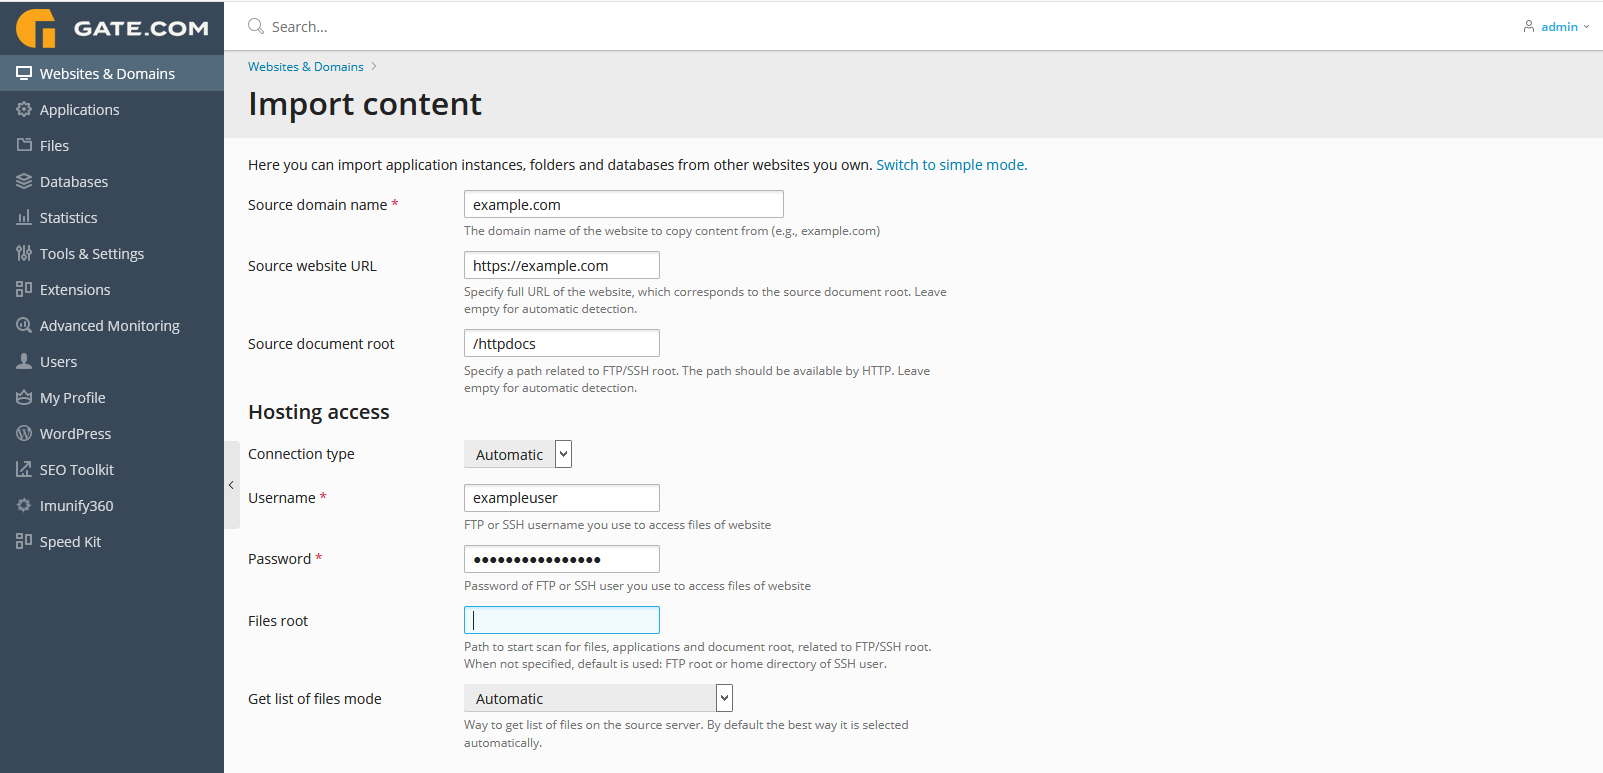
- Specify the domain name of the website you want to import content from in the “Source domain name” field.
- Under “Connection type”, select “FTP”.
- Specify the username and password of an FTP user on the source server that has access to the source website’s files in the corresponding fields.
- Select the desired method for transferring content under “Way to transfer files”:
- (Recommended) If you keep “Automatic”, FTP will be used to import content.
- You can also use web streaming by selecting it from the list. Web streaming is good when you need to import a large number of small files or if you believe that the import may be interrupted, but choosing it may cause issues with the import.
- Specify the document root of the source website starting from the FTP user’s home directory in the “Source document root” field. For example, if the document root of the source website is
/var/www/vhosts/example.com/httpdocsand the home directory of the FTP user is/httpdocs, specify/httpdocsin the “Source document root” field and keep the “File root” field empty. - Specify the full URL corresponding to the document root of the source website in the “Source website URL” field. For example, if the document root is
/var/www/vhosts/example.com/httpdocs, specifyhttps://example.comin the “Source website URL” field. If the document root isvar/www/vhosts/example.com/httpdocs/my/wordpress, specifyhttps://example.com/my/wordpressin the “Source website URL” field. - Click OK.
If the connection and scan were successfully, you should see a screen such as this one, showing the application to import:

To import an application, follow these steps:
- Select the checkbox(es) next to the application(s) you want to import.
- By default, the application files are placed in the same location relative to the document root they occupied on the source. If desired, you can change where to place the application files on the target server. To do so, click the / link under “Destination Path” and type in the path to the destination folder (relative to the document root).
- Click Start Import.
The installation’s status will change from “Ready for import” to “Queued”, and then to “In progress”. Once the status changes to “Imported”, application importing was finished.
