You can register a new domain or transfer your existing domain to Gate. This article will help you prepare your domain name for an inbound transfer and manage it through the transfer process.
The article contains the following sections:
I. Prepare your Domain name for a domain transfer
II. How to initiate the transfer process
This article assumes that you are already familiar with how to log in to the Account Portal. If you do not know how to log in or have forgotten your password, please refer to this article first.
I. Prepare your Domain for transfer to Gate
If you have already registered your domain name elsewhere and would like to transfer the registration from another registrar to Gate, you must prepare the domain name and purchase the transfer.
Getting started before you can transfer a domain:
- Check if the Domain name has not expired/it is not going to expire soon
- Verify that the Domain name is not within 60 days of initial registration or a previous transfer
- Verify that the domain is unlocked
- Obtain the Domain's transfer authorization code (also referred to as an EPP or auth code)
All of the above has to be done from your current registrar’s end. If you do not know your registrar name, you can go to https://lookup.icann.org/ and do a Whois lookup for your Registrar.
Please note that any domain registered or previously transferred within the past 60 days cannot be transferred to us. This is an ICANN regulation and not a policy of Gate. You can read more about this policy here: https://www.icann.org/resources/pages/name-holder-faqs-2017-10-10-en
Keep in mind the following:
- The transfer process typically takes from 5 to 7 days
- The inbound domain transfer extends your domain name’s expiration date by 1 year*
- The domain name transfer won’t change your current Registrant (Whois) contact information and your nameservers
- Whois and/or name server changes will not take effect during domain transfer. You have to perform them either before the transfer is initiated or after the transfer completes
* Excludes certain TLDs and recently renewed domains.
Note: In order to start using our Managed WordPress services right away, you need to point your domain to our nameservers (sns1.gate.com and sns2.gate.com) or point its DNS records to us prior the start of the domain transfer.
II. How to initiate the transfer process
Customers are able to use the Gate.com Store to request a domain transfer at any time. If you a new customer, you will be prompted to create a new Gate account before placing your order.
Before transferring a domain, please be sure that your current domain registrar has unlocked the domain and provided you with the correct domain's transfer code.
This section contains instructions on how to transfer a domain name:
- For New Customers via Gate.com Store
- For Existing Customers via your existing account
a. For New Customers via Gate.com Store
The below steps will work for transferring a domain for both new and existing Gate customers.
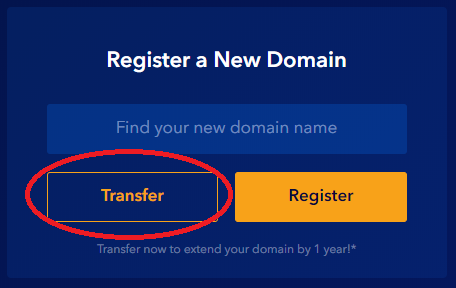
1. In your web browser, navigate to https://secure.gate.com/cart.php. On the right side of the page you will see the Actions sidebar. Click on Transfer in a Domain to start the process.
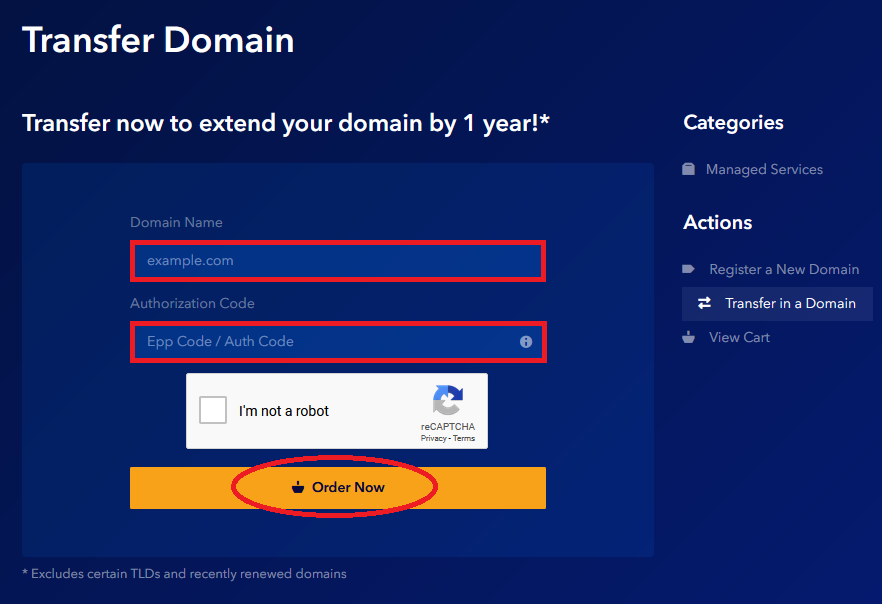
2. Enter the Domain Name you would like to transfer and the correct Authorization Code (it is recommended to use the copy and paste method). Then click Order Now.
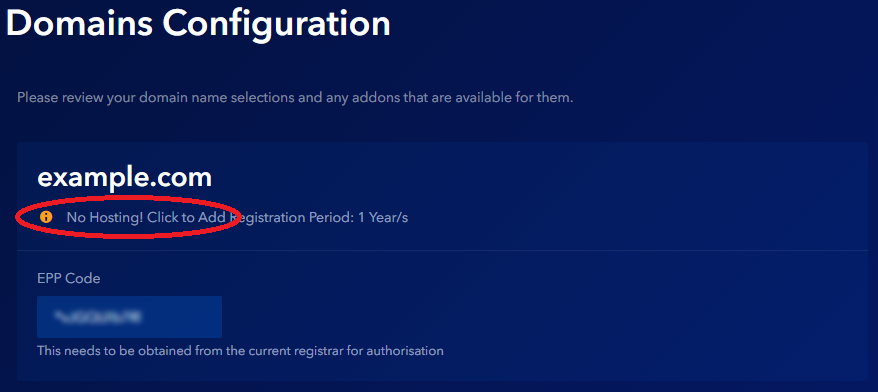
3. On the next page you can review your Domains Configuration. To order Managed WordPress Services for your domain name as an add-on, click No Hosting! Click to Add.
By default, new domains will use our nameservers (sns1.gate.com and sns2.gate.com) for hosting on our network. If you want to use custom nameservers you can enter them now on this page. A minimum of two authoritative name servers are required.
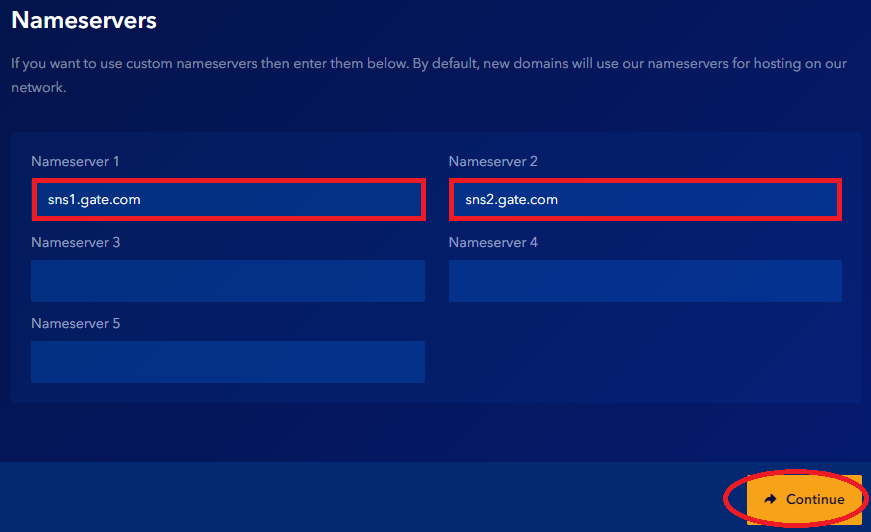
To save the changes (if any) and to proceed to the next page, click Continue.
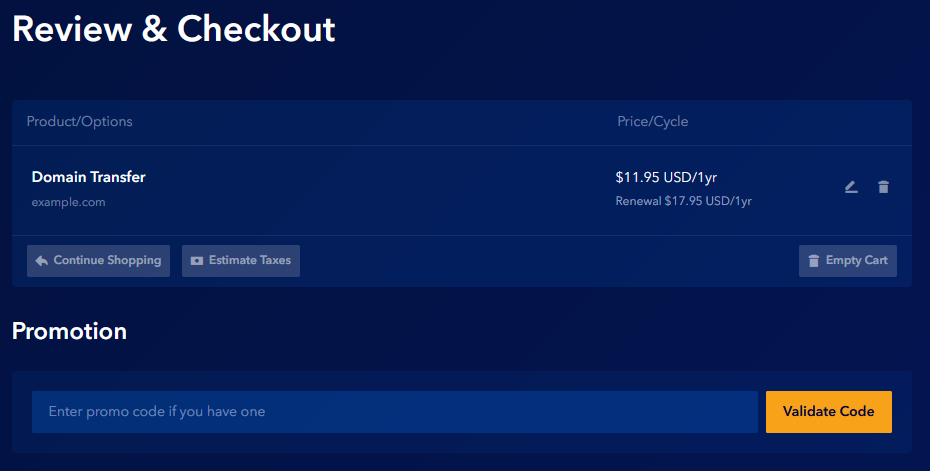
4. The Review & Checkout page
On this page your will be able to:
- Review your Product or Options
- Enter promo code (if you have one)

- Review your Billing Details
If you are a new customer, please fill in the Billing Details for your new account.
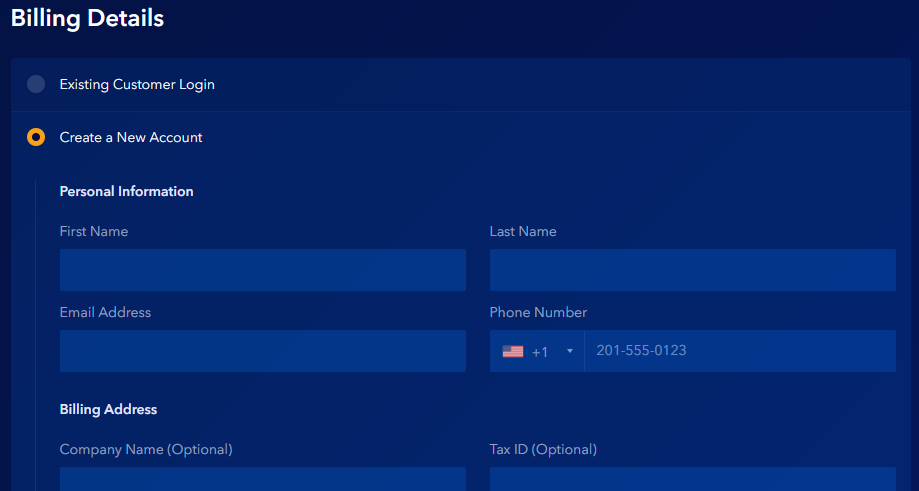
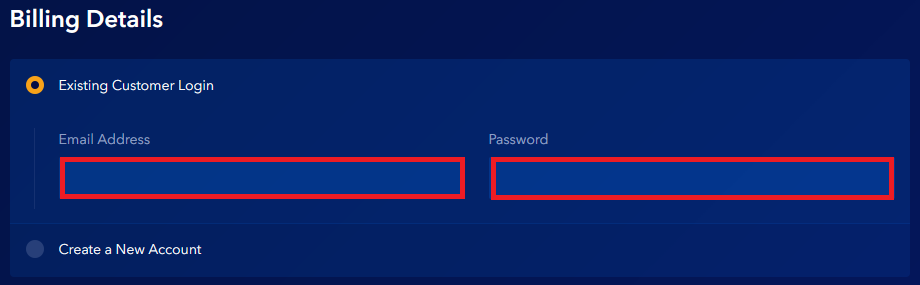
Or if you are an existing customer, please enter your customer login information.
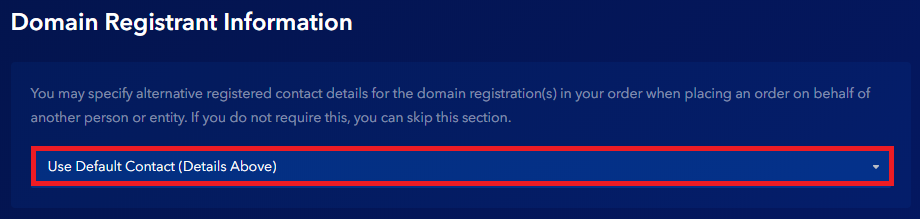
- Choose if you want to use the default Contact (Billing) Details for Domain Registrant (WHOIS) Information. Or you may specify alternative registered contact details for the domain registration(s) in your order when placing an order on behalf of another person or entity.
Note: The Domain Registrant contact information can be changed at a later time in the Account Portal.

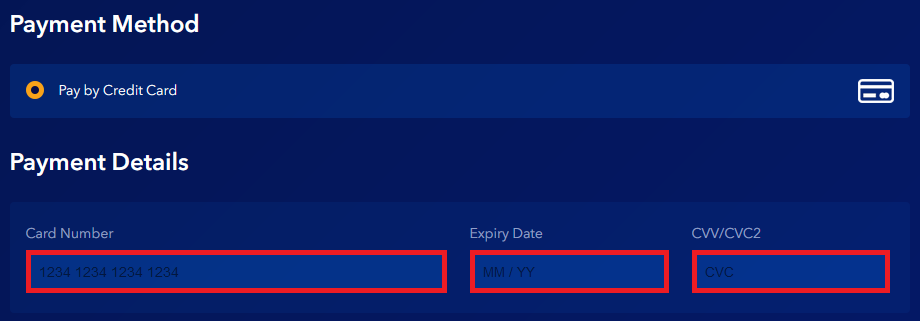
- Choose the Payment Method
Here you can enter your Credit Card information
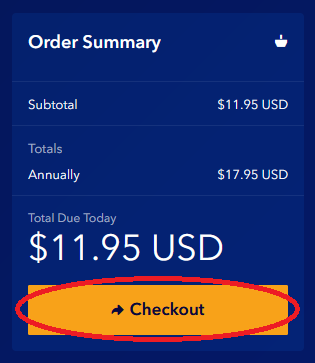
5. On the right side of the page you will see the Order Summary sidebar. When you are ready, click Checkout to place the order.

b. For Existing Customers via your existing account
1. Log in to your Account Portal Area at https://secure.gate.com/. You can initiate the inbound transfer of your domain name directly from your Dashboard / Portal Home.
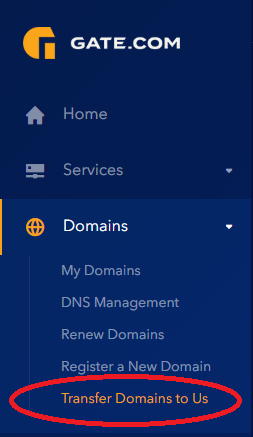
Alternatively, you can click on Domains and then on Transfer Domains to Us from the left sidebar.
2. Enter the Domain Name you would like to transfer and the correct Authorization Code (it is recommended to use the copy and paste method). Then click Order Now.

3. On the next page you can review your Domains Configuration. To order Managed WordPress Services for your domain name as an add-on, click No Hosting! Click to Add.
By default, new domains will use our nameservers (sns1.gate.com and sns2.gate.com) for hosting on our network. If you want to use custom nameservers you can enter them now on this page. A minimum of two authoritative name servers are required.

To save the changes (if any) and to proceed to the next page, click Continue.
4. The Review & Checkout page
On this page your will be able to:
- Review your Product or Options
- Enter promo code (if you have one)
- Review your Billing Details
- Choose if you want to use the default Contact (Billing) Details for Domain Registrant (WHOIS) Information. Or you may specify alternative registered contact details for the domain registration(s) in your order when placing an order on behalf of another person or entity.
Note: The Domain Registrant contact information can be changed at a later time in the Account Portal.
- Choose the Payment Method
As an existing customer, you can either use your default payment method (existing Credit Card) or use another card for one-time payment.

On the right side of the page you will see the Order Summary sidebar. When you are ready, click Checkout to place the order.
If you have any further questions that were not answered in this article, please contact us.
